Google+ House Revivals

Thursday, January 24, 2019

Adhesive Backed Tile DIY {EAsy}

This peal and stick tile update DIY project turned out so stinkin' cute! My daughter was looking for an affordable way to tile her kitchen back splash. With two dogs, a cat, a bunny, and a toddler running around, she didn't have a lot of time or energy for messy grout projects, and she needed to be able to drop everything in an instant, if the baby cried.


She went online to do some research, and found peel and stick tiles (check the bottom of this post for affiliate links to similar products). Her builder grade kitchen had basic drywall back splashes, and she wanted something more attractive and easy to clean.


She was able to do her entire back splash in one afternoon!


She ordered a brand called Smart Tiles, that came six 12" x 12" tiles to a pack. She needed two packs for her project.


The dimensional tiles seem to be a vinyl type of material, and are very thin.


You can see how flexible the tile sheets are.


The tiles are designed so that the pattern interlocks from tile sheet to tile sheet.


My daughter found the instructions to be very easy to follow. It couldn't have been easier. Start by cleaning the wall with a good degreaser. Next, use a level or chalk line to create a guideline. Then, measure and cut. A utility knife and metal ruler make it easy to create perfect cuts. Cut out holes for outlets before installing the tile. Finally, fold back half of the paper backing and carefully align the tile. Once you are happy with the placement, press into place, while peeling back the rest of the adhesive backing. Rub your hand across the tile sheet, to make sure you have good adhesion.


The finished result was beautiful.


There are so many different tile patterns and colors available -- I seriously plan to try this in my own kitchen!

If you enjoyed this post, you might also enjoy this post about decorating with a brown sofa.


If you enjoyed this tutorial, please subscribe to House Revivals in the sidebar, so you won't miss the fun projects we have scheduled. Find us on Facebook, too, so you can catch all the "in between" stuff, and see what I'm working on daily on Instagram. Feel free to link today's post to your favorite social media sites.

Thanks so much for stopping by!
Amanda

Thursday, January 10, 2019

Comic Book Rose Wedding Bouquet

On Tuesday, I shared how to make paper roses, using measuring spoons to form each petal. Today, I am sharing how to turn those roses into a unique and beautiful bridal bouquet -- Dr. Who style!


To create the bouquet, I ordered a couple of Sonic Screwdrivers from Amazon, and bought a couple of Styrofoam spheres from a local craft store. I bought two sizes of each item, because I wasn't sure which would work best. After some experimentation, and consulting with the bride, I chose the larger Sonic Screwdriver and the six inch diameter Styrofoam sphere. The "screwdriver" would be the bouquet's handle, and the sphere would be the base of the bouquet.


The comic book page roses would be adhered to the base, using hot glue.


I started by flattening one side of the styrofoam base. This was done by carefully pressing one side of the sphere against a hard flat surface. Next, I took a steak knife and "drilled" out a hole for the top of the "screwdriver." Since the screwdriver actually opens up and lights up, I was careful to insert the handle so that the part that opened could open, and the part that lighted up could be seen from the top of the bouquet.


Next, the roses were attached to the styrofoam, starting at the bottom, and working up.


The bride wanted plain blue roses interspersed with the comic roses, so those were added, as well.


I was careful to use all predominately orange petals, or all blue petals, etc, when making each rose, and was mindful of how the colors were distributed throughout the bouquet.


After all the flowers were in place, the bottom of the bouquet needed to be addressed, as flattened Styrofoam is not terribly attractive.


I cut wide grosgrain and satin ribbon into six inch lengths and glued them into loops, as shown above.


These loops were then glued to the bottom of the bouquet, in alternating layers. To give the piece a nice finished look, I punched a large scalloped circle from a piece of the blue paper and cut a circle out of the center of the punched paper the same diameter as the collar of the screwdriver. A slit was cut into one side of the circle, so it could be slipped over the collar. This piece was then glued into place to cover the raw edges of the ribbon.


The bride loved her bouquet.


There were even enough extra petals to make the groom a matching boutonniere!


The wedding was beautiful, and the happy couple, a year and a half later, are the proud parents of a sweet baby boy!


This lovely couple may not live in the pages of a graphic novel, in their day to day life....


But they are definitely living their happily ever after.


If you enjoyed this post, you might also enjoy this post about how to make a flower garland.


If you enjoyed this tutorial, please subscribe to House Revivals in the sidebar, so you won't miss the fun projects we have scheduled. Find us on Facebook, too, so you can catch all the "in between" stuff, and see what I'm working on daily on Instagram. Feel free to link today's post to your favorite social media sites.

Thanks so much for stopping by!
Amanda

Tuesday, January 8, 2019

Make These Comic Book Roses!

Happy New Year to all my readers. I hope your holidays were joyful. In spite of being taken out for most of the month of December by a nasty flu bug, ours was still a joyous Christmas. Our oldest son proposed to his girlfriend on Christmas Eve, and she said yes!


Needless to say, I have weddings on the brain, going into 2019, so I thought I would share a tutorial for paper roses that I used to make a wedding bouquet for the daughter of a dear friend a couple of years ago.

Tuesday, December 4, 2018

Repair Broken Makeup and Create a Travel Makeup Palette

Do you get frustrated when you drop a compact or your eye shadow, and your makeup shatters? Me too! I also get frustrated with "all in one" makeup palettes that have too much of one type of makeup, and not enough of another.


That was the problem I had with this drug store makeup palette. It had way too much eye shadow, a little too much lip color, and most of the blush had broken out of the palette.

Thursday, November 29, 2018

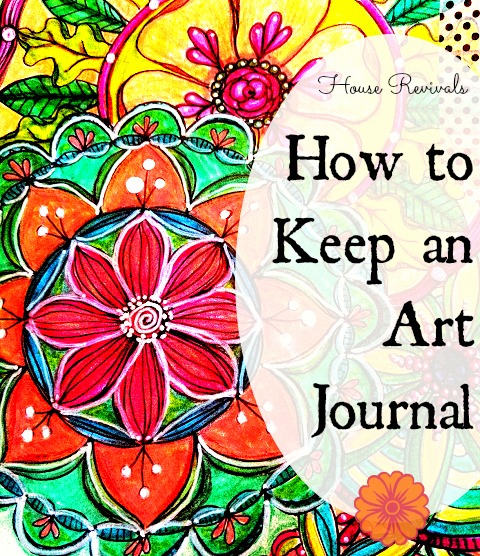
How to Keep an Art Journal

I have several journals. I have prayer journals, planner journals, idea journals, and paste books, but my favorite journals are art journals.


You will usually see me talking about altered book journals, which I make from discarded books -- these are great for mixed media projects.

Tuesday, November 27, 2018

Make This Easy Last Minute Advent Calendar

Here is an easy last minute Advent Calendar that anyone can make. This project uses vintage book pages, but you can use pretty scrap book paper, as well.


It is so easy to create these pretty little advent envelopes.

Thursday, November 22, 2018

Black Friday Shopping for FREE stuff!

Skip the crowds this Black Friday, and shop from the comfort of your home -- without spending a dime!  I have scoured our local Free listings on Craigslist to find all sorts of great stuff.


If you find something as amazing as this mirrored armoire, grab the truck and go get it! It's stunning, just as it is.


This white painted armoire, from Restoration Hardware, costs $1800!


I am in love with this french provincial dresser!


It is missing veneer in a couple of places, so it's a perfect candidate for a little wood putty and paint, like this dresser, from This and That Life.


This leather sofa is in good condition, structurally, and just needs to have the leather reconditioned to be beautiful, once again.


These channel back chairs look like they've spent the last sixty years in an unused living room. I might pull the skirts off, to update them, but the off white upholstery is in great shape, and off-white is always classic.


People are often giving away faded or dated framed art. These make great "canvases" to create new art pieces for your walls.


Here's an easy example of how to create your own wall decor. If you are doing this over an old piece of art, give it a good base coat of paint, first, and let that dry completely before taping a pattern off with painter's tape or masking tape.


Two things, in the picture below, caught my attention. First, the vintage metal doll crib is just darling. I might use it like a basket, and store extra lap blankets in it, keeping it under an end table.


Second, that ornate frame is gorgeous! I would clean it up and put a thin piece of plywood in it, painted with chalkboard paint, like this one.


If you have someone strong in your life, you might grab this vintage safe. It has a working combination!


So much great patina! I would clean it and seal it and put it in my living room.


I've seen these converted to occasional table and dry bars. Here is one I found on Apartment Therapy.


While a stack of old magazines might seem like a strange thing to get on Craigslist, collage artists, and papier mache artists and crafters can find all sorts of things to do with them.


This starburst mirror was made from magazine pages!


And then there are the ubiquitous paint listings. You can paint your house, paint your armoire, paint your mirror, and still have paint left over!


I love wheeled carts. They are great for craft supplies, sewing supplies, party drink stations, etc.

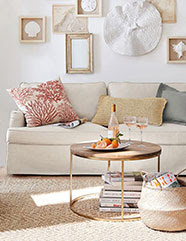
These beige sofas are clean and in good repair, with classic lines.


Add some pretty pillows, like these, from Pottery Barn, and your living room will be a show stopper!


You might also enjoy this post on how to weave a rush seat.


Or you might like this post on mixing paneling styles.


If you enjoyed this tutorial, please subscribe to House Revivals in the sidebar, so you won't miss the fun projects we have scheduled. Find us on Facebook, too, so you can catch all the "in between" stuff, and see what I'm working on daily on Instagram. Feel free to link today's post to your favorite social media sites.

Thanks so much for stopping by!
Amanda